Top 25 Best Kali Linux Tools For Beginners
Becoming an Ethical Hacker is not quite as easy as to become a
software developer, or programmer. An Ethical Hacker a.k.a Penetration
Tester has to have a good understanding about various fields. Not just
merely having in-depth programming languages in C, C++, Python, PHP,
etc. Also in need is an advance Linux/Unix Environment knowledge just to
get started in the field of Ethical Hacking.
Kali Linux comes with tons of pre-installed penetration testing
tools, around about 600 tools included. As a beginner penetration
tester, it sounds horrible. How could one learn or use all of those
tools as a beginner? The truth is, you don’t need to master all of
those, indeed, there are a lot of tools built into Kali Linux which have
the same concept and purpose. But, among them, there are always the
best. In this article I will cover the Top 25 Best Kali Linux tools for
the beginner Penetration Tester. But if you’ve just installed Kali
Linux, before you read further to this,
i recommend you read here it is a good jump start into Kali.
The top 25 best Kali Linux tools I listed below, are based on
functionality and also, its sequence in the Penetration Testing Cycle or
procedure. If you have already followed along my earlier article in the
Penetration Testing Cycle
section, there are basically four procedures: Reconnaissance, Scanning,
Exploitation and Post-Exploitation. Here I listed bottom to top best 25
Kali Linux tools, starting from Anonymity.
ANONYMITY
During penetration testing, it is crucial to prepare to stay
anonymous. Don’t fool yourself by revealing your own identity while
hacking, cover it!
25. MacChanger
There are several reasons changing the MAC address is important, I
use MacChanger while pentesting a wireless network with MAC filtering
enabled and have to assign an approved MAC address to the wireless
adapter. Or just literally to change to a random MAC while pentesting.
To use MacChanger, follow this command pattern:
~$ macchanger [options] networkDevice |
-h, --help Print this help |
-V, --version Print version and exit |
-s, --show Print the MAC address and exit |
-e, --ending Don't change the vendor bytes |
-a, --another Set random vendor MAC of the same kind |
-A Set random vendor MAC of any kind |
-p, --permanent Reset to original, permanent hardware MAC |
-r, --random Set fully random MAC |
-l, --list[=keyword] Print known vendors |
-b, --bia Pretend to be a burned-in-address |
-m, --mac=XX:XX:XX:XX:XX:XX |
--mac XX:XX:XX:XX:XX:XX Set the MAC XX:XX:XX:XX:XX:XX |
For example, i use my WLAN1 device to connect to the network, to
change the default WLAN1 MAC address fully random, i type the command:
24. ProxyChains
Proxychains cover and handle whatever job. Add command “proxychains”
for every job, that means we enable Proxychains service. For example i
want to trigger ProxyChain to cover NMAP. The command is:
~$ proxychains nmap 74.125.68.101 -v -T4 |
But, before you use ProxyChains, you need to configure it first,
adding proxy IP and other things, see full tutorial about ProxyChains
here:
https://linuxhint.com/proxychains-tutorial/
INFORMATION GATHERING
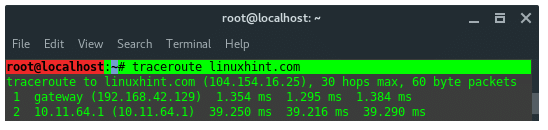
23. TraceRoute
Traceroute is a computer network diagnostic tool for displaying the
connection route and measuring transit delays of packets across an IP
network.
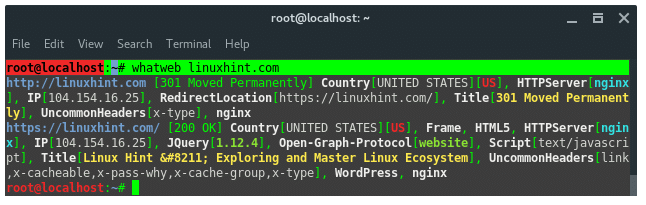
22.WhatWeb
WhatWeb is a website fingerprint utility. It identifies websites
including content management systems (CMS), blogging platforms,
statistic/analytic packages, JavaScript libraries, web servers, and
embedded devices. WhatWeb has over 1700 plugins, each to recognize
something different. WhatWeb also identifies version numbers, email
addresses, account IDs, web framework modules, SQL errors, and more.
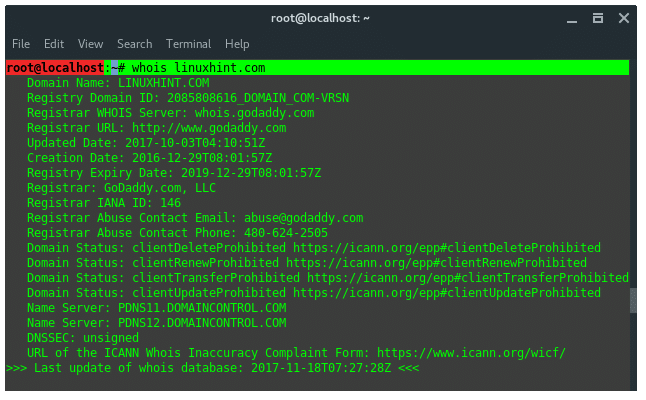
21. Whois
WHOIS is a database managed by local internet registrars, it is a
query and response protocol that is widely used for querying databases
that store the registered users of an Internet resource, such as a
domain name or an IP address block, but is also used for a wider range
of other personal information about the domain owner.
20. Maltegoce (Maltego Community Edition)
Maltegoce is an intelligence gathering tool which aims to discover
and collect data about the target (company or personal) and visualizes
that collected data into graph for analysis. Before we are using
maltegoce, first register an maltego community edition here :
https://www.paterva.com/web7/community/community.php
Once your done registering, now open the terminal and type
“maltegoce”. wait a brief moment for it to startup. After it finishes
loading, you will be greeted by a screen asking you to login to Maltego
Community Edition.
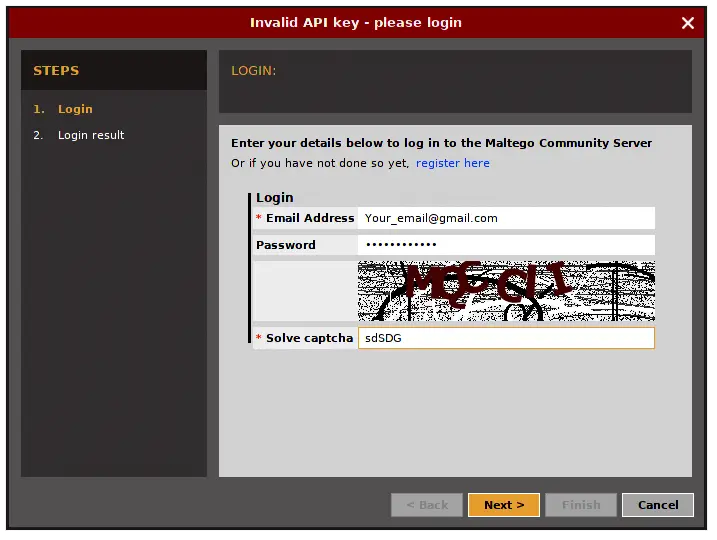
Sign in with the account you’ve just registered. After you are logged
in you need to decide what type of “machine” is needed to run against
the target.
- Company Stalker (gathers reconnaisance)
- Footprint L1 (basic reconnaisance)
- Footprint L2 (moderate amount of reconnaisance)
- Footprint L3 (intense and the most complete reconnaisance)
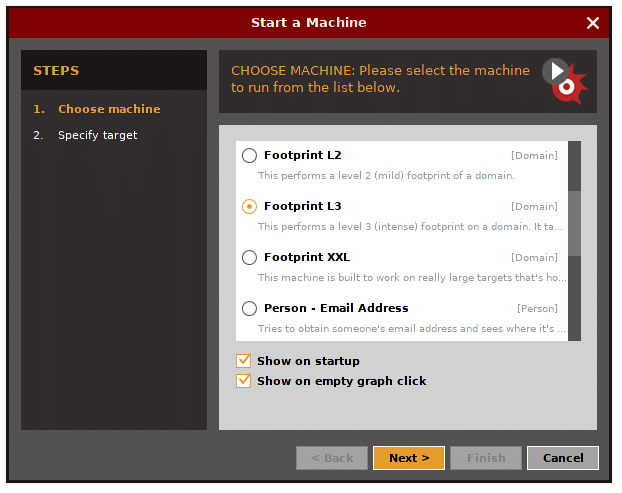
Let’s choose L3 footprint.
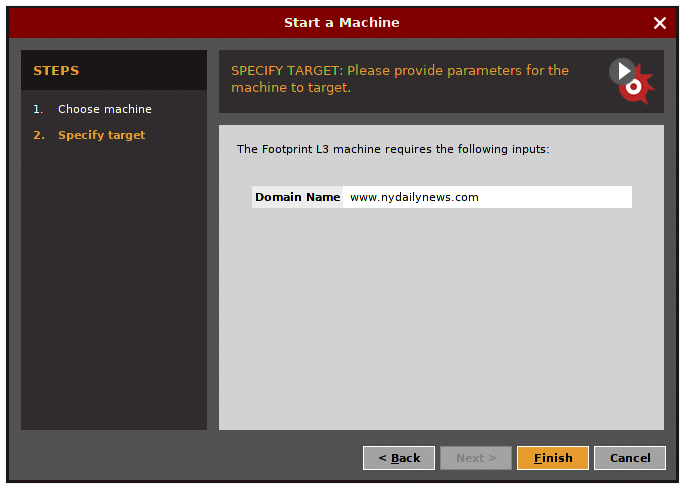
Enter the target domain name.

The result should look like that, it display whatever found, and visualize it in graph.
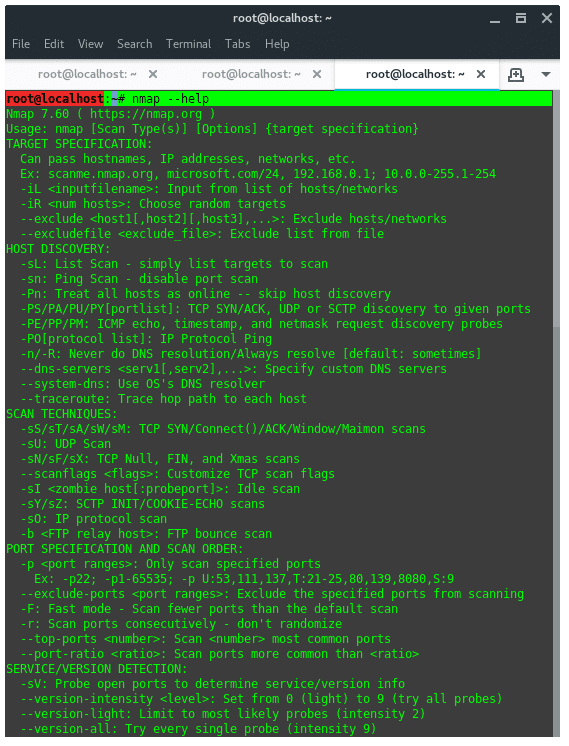
19. NMAP
Network Mapper (NMap) is a tool used for network discovery and
security auditing. My favorite option in NMAP is “–script vuln” it tells
NMAP to audit the security of each open port on target using NSE. For
example:
~$ nmap kali.org --script vuln |
To view full list of NMAP features, see the help page instead.
18. Dirbuster / Dirb
Dirb is a tool to find hidden objects, files and directories on a
website. Dirb works by launching a dictionary based attack against a web
server and analyzing the response. DIRB comes with a set of
preconfigured wordlists, located under
/usr/share/dirb/wordlists/. To launch dirb, use the following command pattern:
~$ dirb [TARGET] [WORDLISTS_FILE] |
VULNERABILITY ANALYSIS
17. Nikto
Nikto is webserver and web application assessment tool to find
potential security issues and vulnerabilities. Nikto scans for 6700
potentially dangerous files/programs. To run Nikto, type following
command:
~$ nikto -h [hostname or IP address] |
WEB APPLICATION ANALYSIS
16. SQLiv
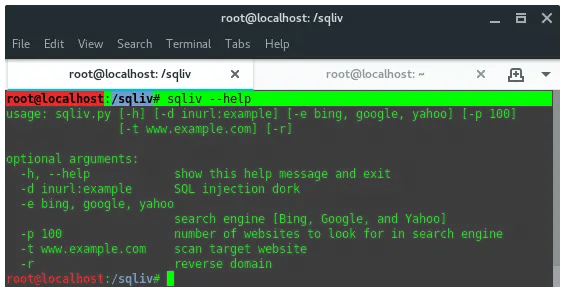
SQLiv is a simple and massive SQL injection vulnerability scanner.
SQLiv is not installed by default in Kali Linux. To install it, run the
following commands:
~$ cd sqliv && sudo python2 setup.py -i |
Once installed, just type in the terminal:
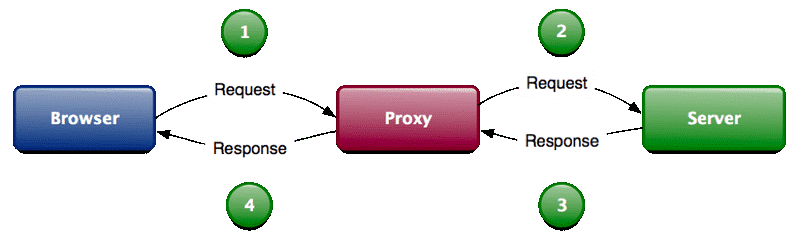
15. BurpSuite
Burp Suite is a collection of tools bundled into a single suite
which performs security testing of web applications, from initial
mapping and analysis of an application’s attack surface, through to
finding and exploiting security vulnerabilities. The main features of
Burpsuite is that it can function as an intercepting proxy (see image
below). Burpsuite intercepts the traffic between a web browser and the
web server.
To open burpsuite, type “burpsuite” into the terminal.
14. OWASP-ZAP
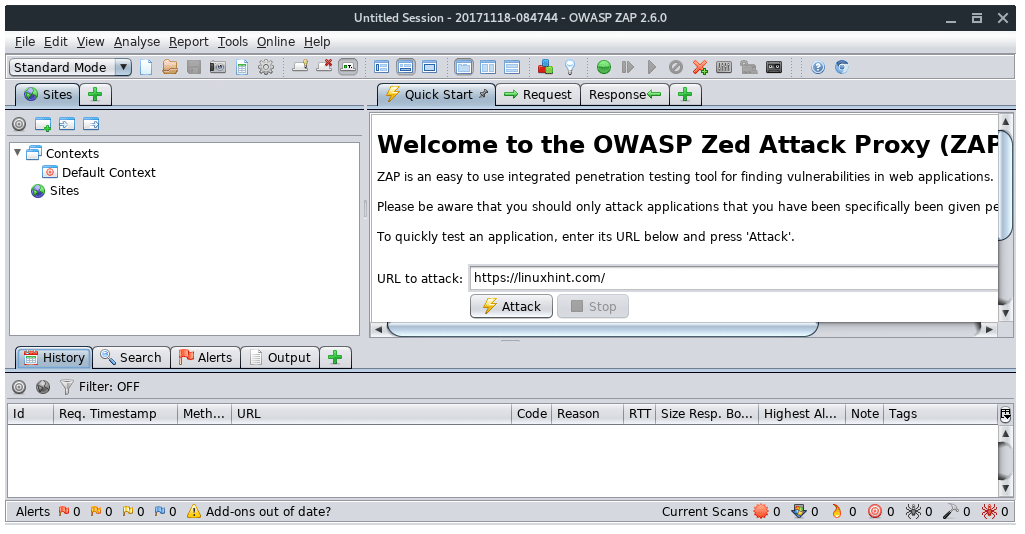
OWASP ZAP is a Java-based tool for testing web app security. It has
an intuitive GUI and powerful features to do such things as fuzzing,
scripting, spidering, proxying and attacking web apps. It is also
extensible through a number of plugins. In this way, it is an all-in-one
web app testing tool.
To open OWASP ZAP, type “owasp-zap” into the terminal.
13. HTTRACK
Httrack is a website / webpage cloner, from a penetration testing
perspective, it is mainly used to create a fake website, or phising in
attacker server. Run httrack wizard by typing in the terminal :
You will be prompted, some configuration needed with guidance. Such
as, Project name, Base path of the project, set the URL target and the
proxy configuration.

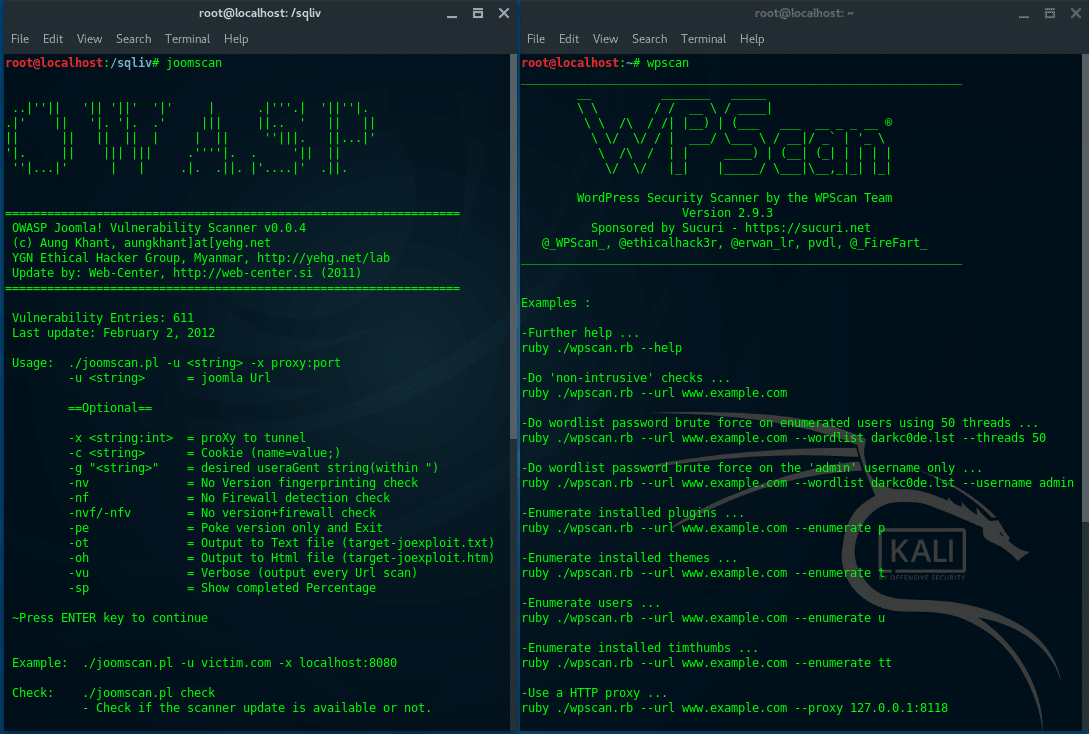
12. JoomScan & WPScan
JoomScan is a Web application analysis tool to scan and analyze
Joomla CMS, while WPScan is a WordPress CMS vulnerability scanner. To
check what CMS is installed on a target website, you can use either
ONLINE CMS Scanner, or using additional tools, “CMSMap”.
(https://github.com/Dionach/CMSmap). Once you know the target CMS,
whether it is Joomla or WordPress, then you can decide to use JoomsScan
or WPScan.
Run JoomScan:
~$ joomscan -u victim.com |
Run WPScan:
DATABASE ASSESSMENT
11. SQLMap
SQLMAP automates the process of detecting and exploiting SQL
injection vulnerabilities and taking over databases. To use SQLMap, you
need to find a website URL which is SQL injection vulnerable, you can
find it by either using SQLiv (see list number) or using Google dork.
Once you’ve got the vulnerable SQL injection URL, then open the terminal
and run the following command pattern:
- Acquire databases list
~$ sqlmap -u "[VULN SQLI URL]" --dbs |
- Acquire tables list
~$ sqlmap -u "[VULN SQLI URL]" -D [DATABASE_NAME] --tables |
- Acquire columns list
~$ sqlmap -u "[VULN SQLI URL]" -D [DATABASE_NAME] -T [TABLE_NAME] --columns |
- Acquire the data
~$ sqlmap -u "[VULN SQLI URL]" -D [DATABASE_NAME] -T [TABLE_NAME] -C [COLUMN_NAME] --dump |
For example, let’s say we have vulnerable SQL injection, it is
http://www.vulnsite.com/products/shop.php?id=13. And we’ve already acquired the databases, tables and columns. If we want to acquire the data, then the command is:
Mostly, the data is encrypted, we need another tool to decrypt it. Below is another procedure to get the clear text password.
PASSWORD ATTACKS
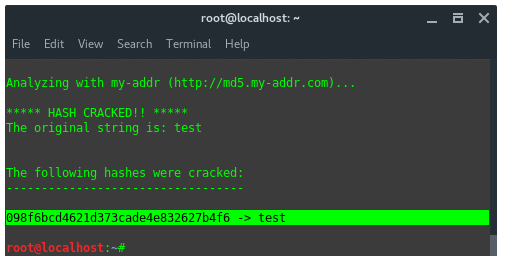
10. Hash-Identifier and findmyhash
Hash-identifier is a tool to identify the different types of hashes
used to encrypt data and especially passwords. Findmyhash is a tool to
crack encrypted passwords or data using online services. For example we
got encrypted data: 098f6bcd4621d373cade4e832627b4f6. First thing you
are going to need to do is identify the hash type. To do that, launch
“hash-identifier” in terminal, and input the hash value on it.
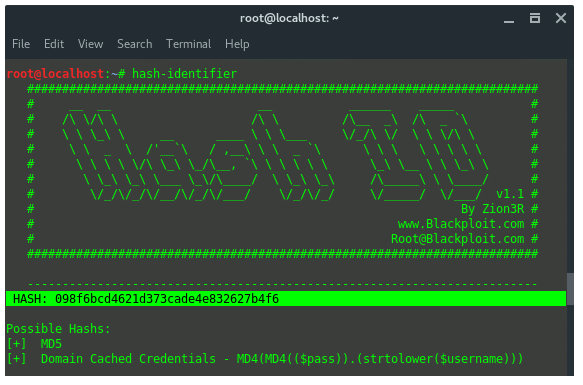
Hash-identifier detected this decrypted data is using hash algorithm
MD5. After its hash type is known, then we use another tool, findmyhash
to crack the data. Now, type in the terminal:
~$ findmyhash MD5 -h 098f6bcd4621d373cade4e832627b4f6 |
The result would be like this:
9. Crunch
Crunch is a utility to create custom wordlists, where you can specify
a standard character set or a character set you specify. crunch can
generate all possible combinations and permutations.
The basic syntax for crunch looks like this:
~$ crunch <min> max<max> <characterset> -t <pattern> -o <output filename> |
Now, let’s go over what’s included in the syntax above.
-
- min = The minimum password length.
- max = The maximum password length.
- characterset = The character set to be used in generating the passwords.
- -t <pattern> = The specified pattern of the
generated passwords. For instance, if you knew that the target’s
birthday was 0231 (February 31st) and you suspected they used their
birthday in their password, you could generate a password list that
ended with 0231 by giving crunch the pattern @@@@@@@0321. This word
generate passwords up to 11 characters (7 variable and 4 fixed) long
that all ended with 0321.
- -o <outputfile> = save the wordlist into a file name given.
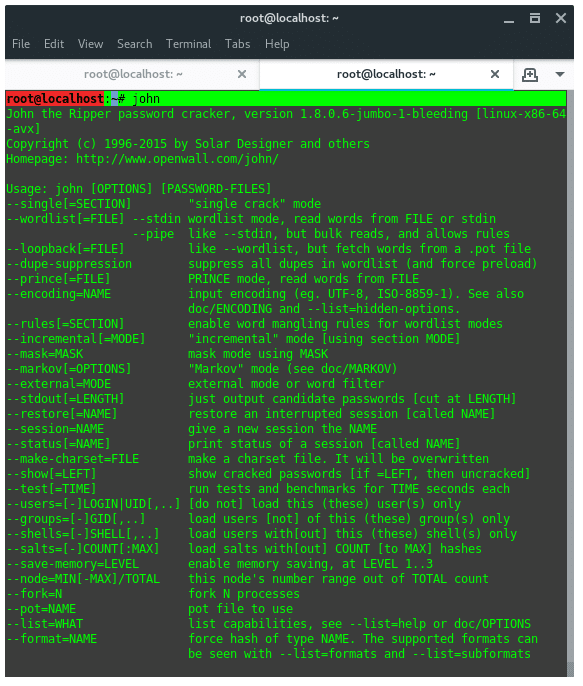
8. John The Ripper (OFFLINE PASSWORD CRACKING SERVICE)
John The Ripper is one of the most popular password testing and
cracking programs as it combines a number of password crackers into one
package, auto-detects password hash types, and includes a customization
cracker. In Linux, “passwd” file located at /etc/passwd contains all
user information. hash SHA encrypted password of each of the users found
is stored in /etc/shadow file.
7. THC Hydra (ONLINE PASSWORD CRACKING SERVICE)
Hydra is the fastest network login cracker which supports numerous
attack protocols. THC Hydra supports these protocols: Cisco AAA, Cisco
auth, Cisco enable, CVS, FTP, HTTP(S)-FORM-GET, HTTP(S)-FORM-POST,
HTTP(S)-GET, HTTP(S)-HEAD, HTTP-Proxy, ICQ, IMAP, IRC, LDAP, MS-SQL,
MySQL, NNTP, Oracle Listener, Oracle SID, PC-Anywhere, PC-NFS, POP3,
PostgreSQL, RDP, Rexec, Rlogin, Rsh, SIP, SMB(NT), SMTP, SMTP Enum, SNMP
v1+v2+v3, SOCKS5, SSH (v1 and v2), SSHKEY, Subversion, Teamspeak (TS2),
Telnet, VMware-Auth, VNC and XMPP.
For more depth and detail tutorial about hydra visit my previous
article titled Crack Web Based Login Page With Hydra in Kali Linux (
https://linuxhint.com/crack-web-based-login-page-with-hydra-in-kali-linux/)
Sumber : https://linuxhint.com/top-25-best-kali-linux-tools/